Showing posts with label Do it yourself. Show all posts

Monday, February 16, 2015

DIY Glitter State Cut(e) Outs

^ See what I did there? :)

Welcome to another session of Do it Yourself with a Little Help From Your Friend (aka: me c") (PS: I'm feeling a little froggy, I've had a nice glass of Zombie Zen Zinfandel wine. Not the best wine I've ever had, but with a nice melted ice cube, it's alright.)

This is what we'll be making tonight:

DIY Glitter State Cut Outs (the easy way.) 

(disregard the "HOME." That was a separate DIY Photoshop project I did for my sister and brother for Christmas.) 


As you can see, I made quite a few of these bad boys. Including letters to go along with (OH!)  The letters were the hardest thing to accomplish because of how tight the corners were in cutting. I had to use small hair trimming scissors in order to get them that tight. 

Now, I know what you're thinking: "Shanna! We've seen a MILLION of these online!" Yes, I have too (that's why I made them!) But none of them (that I've seen personally) take the simple way out... I did. And it was... simple. :) A lot less struggle, heartache and headache (and cheaper too!

So, here's what you'll need: 

  1. One package of card stock paper (or enough to suite your color needs): I used this. Great thing about this package is you can use card stock to make a TON of DIY projects! Including personalized greeting cards. 
  2. The colors of glitter card stock paper you'd like your state to be. (Highlighted and underlined for your viewing pleasure.) I cannot find a link to this on Michaels.com [hate their website] but my local Michael's sales GLITTER CARD STOCK! [makes this project 100 x easier.] 
  3. Scissors 
  4. Printer paper and printer (unless you're an expert freehander) 
  5. Glue 
  6. Picture frame (sold separately.) 

With all of the necessary items in tow, let's get to work! This project should take all of 15 minutes (if you're a swift cutter.) 

Firstly, you'll need to find which state (or letters) you'd like to make into Glittertastic versions of themselves. Print these onto computer paper, to the appropriate size you'd like. I used a nice shade of red glitter card stock (pictured below) for the Ohio State Buckeyes! Carefully trim around the edges of your printer paper cut out. 


Flip your glitter card stock over and trace your letters / state onto the back. A typical size glitter card stock gave me two sets of letters and one state (which fit nicely into a 5" x 7" frame.) Now cut. 


WASN'T THAT SIMPLE? No need for hair spray or messy mod podge. The letters / state come out glittery from the get go. 


The last step is to glue your state and letters down. I did this onto another sheet of card stock (hence the purchase of a package of colors.) For an added touch, you can cut small hearts (of a different color) and add them to the hometown of your loved one, or at least into the general area..
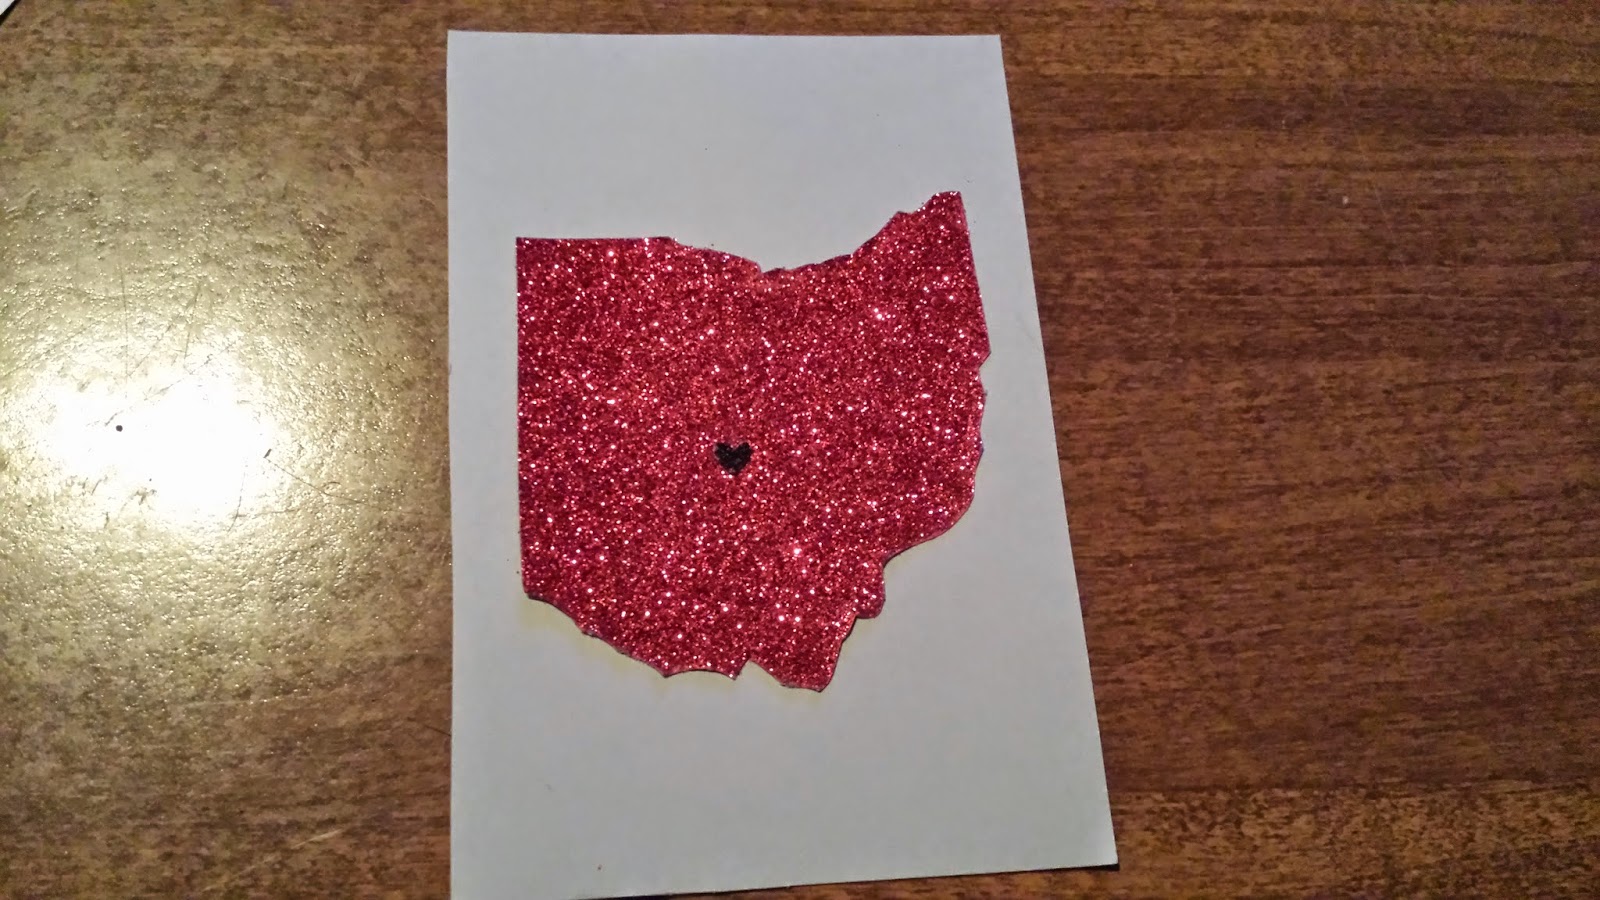


Once dried, place into frame and wrap! That simple!


I'm all about the simple -cough- cheap -cough- way of doing a DIY project.  Stay tuned for more projects (like this one) once we move into our house! I've got a lot of blank walls and a lot of repainting to do, so we'll see what turns up. :)


Tuesday, January 6, 2015

Paint by "Numbers" - DIY Cornhole Boards!

Yet another wonderful Christmas present that I crafted (or well.. partially crafted!)

This is more of a partial craft rather than a DIY.  The expense to buy the wood, power tools and nails/etc. was equal or more than purchasing a pre-crafted set from: Cornhole Express.  The individual here made the quickly and very sturdy!  If you're in North Carolina and you want a good set of Cornhole boards (purchase or for rent) you can get them here!

So I purchased and I painted! I took a general look at these guys here: Cornhole How To to help with a basis of what I would need and how I would need to do it!

What you'll need (without making them yourself):

  1. Set of pre-fabricated wooden cornhole boards
  2. Wood filler and Sand paper (medium) (only if your maker did not do this for you)
  3. Paint brushes and paint rollers (there is a great set at Home Depot for around $10) 
  4. Pint of Wood Primer; I used grey because the nice man at the store told me it is the easiest to cover over
  5. Paint! I actually used Gilden paint samples (5 different ones: scarlet (x2), grey, black and white) and it was enough. Which is great! They are very cheap (about $4 a piece for a sample rather than a pint/quart)
  6. Painter's Tape is a must 
  7. Ruler 
  8. Something to hold your boards off the ground; I used plastic cups
  9. A general idea of how you want your painted boards to finish
  10. Logo/decal to put on your boards, if you'd like one
  11. 1 pint polyurethane


Fill any wood holes and sand down. Prime your board and let it dry! I did this the weekend before I painted because I had to paint them at my mom's house (my apartment just didn't make the bill.)


Now start the painting! I laid down the general basis for the grey first, as the nice man said it was the easiest to cover.


Let that dry fully. Put the painter's tape down and throw another layer of paint on top of the last layer! 


Then through the white on top of the same tape.


I had to only pull the side layers of tape off because I had an extra layer of paint to add. The black was difficult but I managed (but did not take a picture of the extra layer of tape I had to lay down.)


The final paint results were great! I was super happy. My mom really helped me get everything straight. You cannot have crooked cornhole board paint! That just throws the whole game off. 


 Make sure you put your decal on before the polyurethane.  Put a good coating of polyurethane over the top, let dry then add another coat.


My boyfriend loved them as a present (at least he said he did!) And very simple to paint. I'm sure the crafting of the actual board sets was a bit difficult, but Cornhole Express is here to help that in North Carolina (and a few other states, I believe.) 


Sunday, January 4, 2015

DIY Image on Canvas - With a Twist!

Now that Christmas is finally over, I can share all of the DIY projects that I crafted as presents! I finished most of these in September (I think) so I've been waiting a long time to be able to release these posts!

I want to start with the DIY Image on Canvas(es) that I did. I made quite a few of these because they are SO easy. And I mean EASY! 

What you'll need: 

  1. Canvas (of any size) 
  2. The Image you want
  3. Mod Podge
  4. Foam Brush 
  5. Newspaper (or another form of paper to put underneath the craft) 
BONUS: 
  1. String of battery operated craft lights
  2. Batteries 
  3. Staple Gun and staples

Easy, peezy lemon squeezy project!  Once you've gathered all of your materials, lay out your bottom layer of paper. Since Mod Podge dries very quickly, you really need not worry about your canvas sticking to the paper. But it is always a good idea to keep on the lookout for that.

I started with a 6 inch x 6 inch canvas. I got an extremely good deal on a pack of 4 at Michael's during one of their sales. It was buy one get 2 free. So I ended up getting 16 6 x 6 canvases, most of which are gone now!


 Either print your picture or take one (from whatever source you'd like, unless for resale, copyright laws and all) that is on a piece of printer paper (I found this was the easiest.)  I simply filled in some edges in Photoshop and used the picture below, printed on 8 x 10 paper from my at home printer!  The photo was taken by Richard Byers.

Lather up both the canvas and your image with Mod Podge and gently lay the image in the area where you want it to be on the canvas. Since I wanted mine to wrap around the sides, I widened the image a bit (7 x 7) to fit around the corners.

Quickly and firmly press the image down onto the canvas. From there, I flipped over to ensure it would dry together properly. This only took about 2 minutes.


Trim the edges of your image, if necessary. If you do not have an image that runs off the page our you simply put a cut out in the middle/corner, skip over the next little blurb. 

If your image wraps off the canvas: Then flip and cut the corners of your image up until you meet the canvas, just as in the below image. Lather both the side of the canvas and the back of the image/paper. Fold the two together and move to the next side. Do the same for each side. this will make your sides fold onto the side next to it, creating a nice, snug grasp.


After that is done, you'll take your Mod Podge and run a thin but generous layer across both the top of the image and the sides of your canvas to ensure the image looks "glossy" and stays in place.

Do NOT get discouraged at the image starts to look like wet paper like the third image below (because it is wet paper.) When the Mod Podge fully dries (which can take from an hour to overnight, depending on how much you lather on), it will pull tight again! I was pretty upset the first round of images, but the next morning everything was tight and the image looked great!


 Here are some of the other images I did. If you've seen/read my Window Mirror DIY tutorial, then you've already seen the blue stripes. I needed something linear to go in my work office!  The others were just a nice add on to the top of my desk at work, as well.


BONUS: 

For some reason I did not take  images of the canvas of my family and I after it was complete. :( I added a string of battery powered craft lights to the back of them which illuminates a pretty good distance! 

All you have to do is staple them to the back so that they do not light the middle of the canvas. Point them facing out.

Here is an image of the back of another craft project that I did with canvases (just painting, nothing too difficult) with the string of lights attached to the back. I pointed these ones in so they would light up the white section of the canvas, but it is the same general premise! Instead of making them point inward toward the canvas, just staple them around the outer edges to illuminate outward! 


 I made quite a few of these for Christmas. They are easy, simply and quite inexpensive but have a great deal of meaning because you can easily personalize them!


Friday, November 28, 2014

DIY Ornament Wreath

It's been an interesting quite few weeks! The most exciting news is: I've accepted a position with North Carolina State University! I'm extremely excited. I start on December 1st, and I cannot wait.

I've been spending a lot of time doing crafts (which I probably shouldn't be, because I've got a ton of homework that needs to get done)! Mainly Christmas presents that I cannot share yet, but definitely will.

I've never been big on the Christmas decorations. I've never really wanted to get a tree and I didn't really care about Christmas lights. Once I moved in with my boyfriend, however, that changed. I wanted to do those things. D: (He hates Christmas, so I did them alone.)

One of the easiest things I've made in a while, Christmas Ornament Wreath

I looked around in stores because I wanted one for our front door. But I could only find either ridiculously colored ones, over the top ones, or ones that would break the small bank.

So I made my own. And it was extremely simple and cheap (PS: sorry for the lack of pictures, I didn't expect to do this). What you'll need:

  1. Ornaments (obviously.) - I used about 80, I think. All sizes, shapes, colors (of blue and silver).  I went very cheap on these (and at this time of year, it's very easy to do so.) I shopped at Rite-Aid for them. If you have a busy front door, I would recommend non-shatter, but I used glass because my boyfriend and I don't slam our door often. 
  2. Wire Hanger
  3. Pliers (to unhook the wire hanger from itself and hook it back) 
  4. Wire Edge Ribbon (if you want to tie your own.) 
  5. Super Glue (possibly, if you want to glue some ornaments together, but you don't have to.)
  6. Wreath Hanger/Nail (Our apartment door is metal, so I purchased an over the door hanger from Target: here
  7. A Towel (if you want to use glittery ornaments. I did so they didn't shed their glitter everywhere!) 

Firstly, take your wire hanger and stretch it into a "circle." Mine hanger was not able to get all the way to a circle, around the edges where the hanger is.. actually a hanger. I'll be honest, I used my foot to pull the hanger into a more circular shape. It wasn't difficult, but I wanted it to be as perfect as possible.

Take the pliers, clamp them on the twisted portion of your wire hanger. I found it easiest to clamp this portion and twist the rest of the hanger, rather than trying to twist the pliers. This stripped a portion of the hanger before I twisted it fully. Came right off after that!

And from there, go crazy. Add in the ornaments in which ever order you please.  I tried to even mine out so that it didn't have too many of the same shape and same finish. It happened, because I ran out of some finishes, but I didn't want to open a new pack of ornaments if I had some left over.

The order doesn't matter. Just make it look the way you like. Slide them down the hanger and place them right where you want them. This was the part that took me about an hour. If you do not want to glue the ornaments together (I didn't) don't get discouraged if they feel loose. As you begin to add more, they will tighten up. I did glue a few, because I wanted them facing forward rather than backward.

diy do it yourself christmas ornament wreath

Tying the bow was actually one of the hardest parts. I watched this wonderful video (here) to try and get a proper technique. I re-tied quite a few times. I also didn't use the metal bow tie.. thing.. she recommends. I used the tie from a bag of bread (didn't feel like going back to the store and it worked.) 

I actually wanted a few more frills, so I took a little more ribbon and tied it around the bottom of the wire hanger, under the bow. Just to add a few more ribbon strings to the bottom. 

diy do it yourself christmas ornament wreathdiy do it yourself christmas ornament wreath

 
 Hope this was helpful. :) I spent, in total, about $15 dollars. I had the wire hanger previously, and I used a lot of the ribbon for Christmas present wrappings (so I only portioned the price out to the amount I used on the wreath!) These are extremely easy to make and can save a fair bit of money.


Monday, September 22, 2014

A New Job, Some DIY, and HARRY POTTER WORLD!

I've been a crazy past few weeks, to say the least.  I'd like to apologize for being gone for so long!  I've went through a career transition and some hard times recently, and I just haven't set aside the time I need in order to make some worthy postings on this site (I've started many, but never finished.)

But that's no excuse. School is in (pretty sure I just failed an Accounting test, sigh), I have been searching for a new job, and I'm trying to not go crazy.  I received a verbal offer of employment/contingent offer of employment from a company last Friday, so things are looking up in that aspect. I only have to: get a scanner in order to send back paperwork (possibly a complete new printer), purchase a new journal and planner to keep myself organized, and research some new marketing techniques in order to come in swinging when I start!  This position is completely in line with my marketing aspirations and I'm super excited! I had an interview last Friday, with North Carolina State University, that I'm waiting to hear from, but I'm glad I've found a new job that I can call home. I'm super excited to learn new things and expand my knowledge in a field that I love! (Plus, I'm making quite a bit more monies.)

Although it was bittersweet to leave my last job (well.. I got told to leave, essentially), I am very excited to move on. There was nothing at my last job to keep me, nothing else to learn, and I no longer agreed with the values that were present. The company's values were no longer in line with what I valued in a company, a job, and in my personal life. I did not want to wake up each morning to go to work, I was bored each day, and all I wanted to do was go home and sleep when I was at work. In order to become happy and challenge myself with a new career path, I started to interview with other companies.  Once I informed management, I was "let go." This is an extremely big time for me, because this is the first time I've ever "changed jobs" and became unemployed. It's a big move and I'm very scared, but here are five things I've done to keep my head from exploding while looking for jobs:


  • 1) Apply for unemployment -- if you're applicable. This will be a big help getting through the weeks from now until my actual start date with my new company. 
  • 2) Take a day to sleep in -- If you don't have a job any longer, take a day or two on your first week out to enjoy it. I have an issue with slowing and settling down to do nothing, but sometimes, and this is a case of it, you have to take a moment and enjoy a day or two. Who knows when the next time is you'll have a week off? I'm calling it a week off because even if unemployment is a low amount, it's helping you get by (if you're applicable.) 
  • 3) Don't hesitate to talk to recruiters/head-hunters -- I worked at a recruiting firm in my last employment, and it really is not a bad thing. There are head-hunters and their are recruiting firms that you apply to.  Don't get caught up in the "head-hunter-esque" mentality that these people are here to only make a commission. Recruiters mostly do get paid off of commissions, but the only way they get those commissions is if they find you a job. You're their customer, and you can say no if you do not like a job. Just like police officers, they are here to serve you (and their end client.) 
  • 4) It might not be a bad time to look into more education -- If you've wanted to pursue that.  Education can not only be expensive, but very time consuming. If you have dreamed or desired to continue learning, and no longer have a job (for one reason or another), it could be a plausible time to look into further/updated education. There are many different ways to fund school; I'm doing it through Loans through the federal government and scholarships through school. 
  • 5) Get Productive -- I know there are things on my to do list that have been sitting around not getting done because after school and work, I don't want to do anything. Well now that I'm between jobs, I'm doing them, and I'm getting them done.  Even so little as to organize my closet. 
  • 6) Oh and a bonus 6th: Practice interview questions. -- It isn't because I'm still "new" to interviewing that I recommend this. I wanted to sound prepared but not rehearsed, and practicing was honestly a good way to go about understand the ins and outs of answers and questions that may come your way. If you have not been on the job hunt for quite some time, you may not be accustomed to the new interview questions or talking about yourself in manner conducive to employment. Study up and practice hard. Being prepared is NEVER a bad thing.

Unemployment

On another note: 


I have been doing a LOT of DIY projects recently. I've actually marked just about everyone off of my Christmas list through DIY, so that I didn't want until the last second like normal, scrambling to find funds for the perfect gifts for everyone.  So sadly, as of right now I cannot show what these DIY projects are, but after the X-Mas holiday, I'm going to have so many posts it's not even going to be funny!  I've worked on a few things that are personal, and I'll have to get pictures of them.  But stay tuned for what I plan on doing with these wonders beauties below, later this week. :) I'm super excited about them. My boyfriend is bringing 2 small window frames home from work for me, and I think I already know what I want them to be and how I want them to look! (Really glad I have two weeks off before my next job starts. :)) Stay tuned for a DIY Window Frame posting coming soon!  I really hope that some of the supplies I bought are going to do what I am aiming for. :x

DIY, Do it Yourself, Window Frame


Okay, Now I Have a Question For You

My Boyfriend and I are going to The Wizarding World of Harry Potter in Orlando, Florida in just over a month. If you don't know, I'm a super fan of Harry Potter, books and movies, and I'm SUPER EXCITED to be going to the amusement park.  But I need some help figuring out what nightlife to hit, what rides to ride, and what restaurants we should head to (either in the park or outside.)  It's our 1 year anniversary of dating, so I might want to go out for a nice dinner one night, but don't know any good restaurants down there. :) Any ideas would help! 


An Updated Workout Picture


Many of you know I'm on a mission to get to around 18 - 20% body fat. I need to start running and doing more cardio in order to achieve that goal, but this picture from about 4 weeks back makes me very proud.  I couldn't commit to the Natalie Jill Fitness plan for Vegan/Vegetarians because well.. I lost commitment to the mission.  I'm back on it (other than not eating cheese... which is one of the main rules.)  Once the large batch of Mac'N'Cheese my boyfriend made for us is gone, I'll be back on it. I cannot sit and watch myself turn into a "stuffed sausage," as I refer to it. The picture above is were I'd like to progress past.